 |
|||
|
Washington, NC Real Estate - A cool site with real estate information in Washington, Bath, and Belhaven, North Carolina. Greenville, NC Real Estate - Another real estate site with information for Greenville and Winterville, NC. Morehead City, NC Real Estate - Another real estate site with information for Atlantic Beach and Emerald Isle, NC. Jacksonville, NC Real Estate - A real estate site with information for Jacksonville, NC and Richlands, NC and homes for sale. |
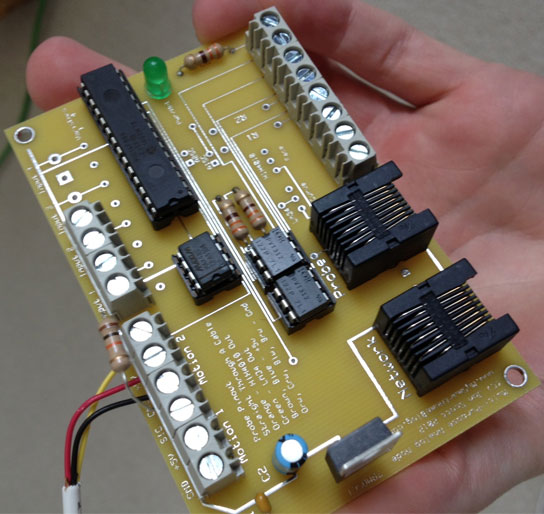
Multi-Purpose Node
Right: Multi-Purpose Node with no temperature or humidity sensors installed, two inputs missing, and no static protection. Features of the Multi-Purpose Node:
The features are completely user selectable. So if I only need the two relays on the board, I can install them and none of the other features like motion detectors, analog inputs, etc. This keeps the cost down. Each of the nodes are configured using network commands to tell it what features are installed on it that are then saved to the on board flash memory in case of a power outage. Where I'm using the Multi-Purpose Nodes currently:
Motion DetectorsI still use motion detectors in several small rooms or large open rooms that need to be broken up into zones. For a long time I used the Insteon motion detectors, but these things are overly large and expensive. Not to mention mine ran through several 9V batteries a year which are a complete pain to change when they are high up.
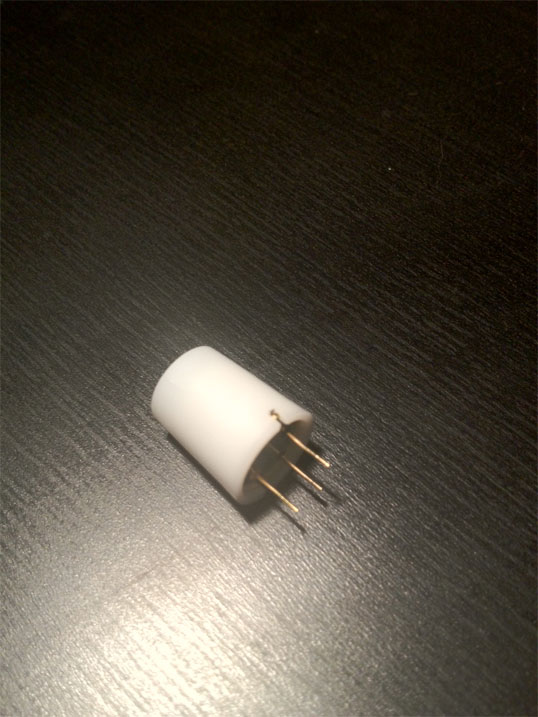
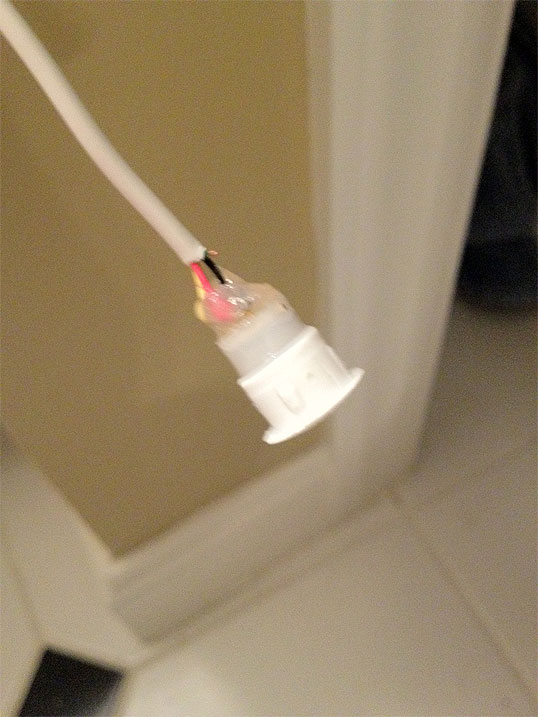
The only problem with them is mounting. They are meant to be used in a professionally designed PIR detector with PCB mounts. So I came up with a better solution. I wanted to use these overhead in my (vaulted) ceilings for vertical detection and on some of my walls for horizontal detection. To do this I would have to place them right in the drywall. The problem with this is you have no way to cover the rough edges of the hole in the drywall to make it aesthetically pleasing. I looked around online for a solution and I ended up ordering 1/2” white hole plugs for $0.15 each that did the trick. The sensors are actually tapered from front to back, so it is slightly thicker at the base of the detector. Using a drill, I drilled a small hole in the back of the plug using the drill bit that fit the inside diameter of the plug. Once this was done, I slid the sensor into the back side of the hole plug and glued it into place. The further you push the sensor down into the plug (flush with the front) the wider the detection cone will be for sensing motion. If its completely flush with the front of the hole plug it will have it's maximum detection range. This come in handy for ceiling mounted sensors where you want to capture only motion in the room the sensor is mounted and not people's feet through the door in the next room. Once the sensor was installed into the hole plug, you then need to solder the three wires (one for +5v power, one for ground, and one for signal) to the back of the sensor. I used some hot glue to cover the solder and pins when I was finished. After this, you can drill a 1/2” hole in the drywall where you want the sensor to be mounted and insert the plug. It looks great and at only a 1/2” diameter it's barely even noticeable in the wall or ceiling.
|
||

© Jon Scott 2012 -- All Rights Reserved.