 |
|
|
Washington, NC Real Estate - A cool site with real estate information in Washington, Bath, and Belhaven, North Carolina. Greenville, NC Real Estate - Another real estate site with information for Greenville and Winterville, NC. Morehead City, NC Real Estate - Another real estate site with information for Atlantic Beach and Emerald Isle, NC. Jacksonville, NC Real Estate - A real estate site with information for Jacksonville, NC and Richlands, NC and homes for sale. |
Servo Controller Node I had to design my own servo controller node because I couldn’t find anything even remotely close to being able to meet my project requirements for my motorized plantation shutters. I have five servo controller nodes distributed throughout my crawlspace, with each node controlling a group of windows. Here are the main hardware features of the servo controller node:
Each of the servo controller nodes can only move one plantation shutter at a time in its group of three due to the current restrictions of the 6v voltage regulator I chose. This is not that big of a deal though as I can move each plantation shutter individually or I can send a command to control them all as a group. The servo controller node sends back a finish command to the main controller once the servo has moved each plantation shutter to its instructed position. I opted to have a solid-state relay for each of the servo motors so that I can turn the power on only when needed. This prevents there from ever being strain on the motor in case it gets caught on some foreign object. It also allows the plantation shutter to still be controlled manually by rotating the slats by hand. I have my servo motors programmed to operate at the highest speed, so it only takes approximately one second to rotate the slats a full 180-degrees. Because of this, when the servo controller node is instructed to control a plantation shutter, the relay for each particular servo motor is only turned on for 1.20 seconds. This ensures that there is ample amount of time to complete even the largest transition (180-degrees) and still makes controlling a group of three plantations shutters quick – only 3.6 seconds to open/close all three. I wired a GFCI outlet in my crawlspace on the bottom of a floor joist. This outlet has the AC to DC power adapter that provides power to all of the servo controller nodes distributed throughout the crawlspace. 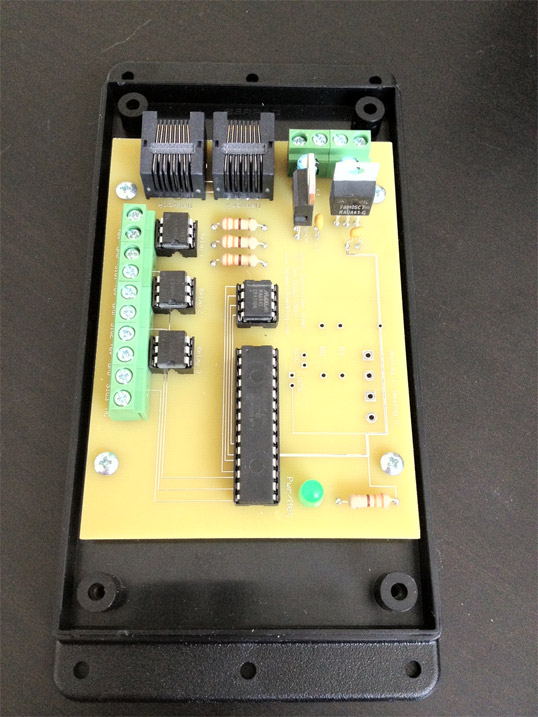 I designed the servo controller node so that it mounts inside a wall-mount enclosure with a clear cover. This way it can be mounted upside down on the bottom of a floor joist near each group of windows and away from any moisture. The clear cover allows me to see the power/network status LED when I'm in the crawlspace. Right: A servo controller node mounted in a case before the clear cover is placed on. Notice how the case has holes on the end for mounting on a wall, or in my case, upside down on a floor joist. The analog inputs have also not been installed on this board. Analog InputsEach of the servo controller nodes has two on-board analog inputs. These can be used for pretty much anything, but are really intended to be used with a photocell and/or temperature sensors. I am using a small photocell on the back of my office plantation shutters that monitors the amount of light entering the window. If it becomes too hot and the sun is too bright during the day in this room, the main controller automatically closes these shutters until the sun changes position overhead – then it opens them back up again. As I mentioned on the plantation shutters page introduction, the master bathroom has plantation shutters over the large whirlpool tub. Because it was always such a pain to open and close these when I took a shower each day, I decided to get creative in this room. In the crawlspace I have wired a thermistor temperature sensor to the incoming hot water pipe on my shower, and another to the incoming hot water pipe on the bathtub. When the main controller detects that the hot water pipe to the shower has heated up rapidly (in other words the shower has been turned on), it immediately closes the plantation shutters over the whirlpool tub if they were open and the plantation shutters in my master bedroom closet. It will keep them shut for 20 minutes after the pipe has cooled back down to a normal temperature, then it opens them all back up again if it is daytime. The same setup happens for when a bath is drawn during the day except it will keep them closed for an hour after the pipe cools back down. Of course this can all be overridden using any touchscreen in the house or an iPhone. Creating Your OwnPCB Layouts: Top Layer / Bottom Layer
|
© Jon Scott 2012 -- All Rights Reserved.